
Where to Install an Ozone Monitor: Placement Rules That Keep Readings Meaningful
Where to Install an Ozone Monitor: Placement Rules That Keep Readings Meaningful
Two facilities can run identical ozone monitors from the same production batch and get readings that differ by a factor of five. The instrument is rarely the reason. Placement is. A monitor mounted in the breathing zone of a worker, four metres from the nearest ozone source, tells you something about that worker's exposure. The same monitor bolted to a wall behind the generator, in the still air of a corner, tells you something about that corner. The number on the display looks equally authoritative in both cases, which is what makes a misplaced monitor dangerous: it produces confidence the instrument has not earned.
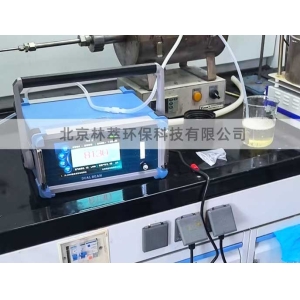
Start With the Question the Reading Has to Answer
Ozone monitoring on an industrial site usually serves one of three purposes, and each one points to a different place on the wall.
1. Worker exposure
If the reading is used to show that people are not over-exposed, the sample has to come from where people breathe. For standing work that means roughly 1.2 to 1.5 m above floor level, in the area the worker actually occupies rather than in an aisle or at the head of the room. OSHA's air contaminants standard, 29 CFR 1910.1000, Table Z-1, sets the permissible exposure limit for ozone at 0.1 ppm as an eight-hour time-weighted average. A monitor used to demonstrate compliance has to see the air that average is calculated from.
2. Leak detection
If the monitor exists to catch a leaking fitting, valve, or cell on an ozone generator, it belongs close to the likely leak points — within a metre or so of the generator enclosure, the compressor seals, and any union that sees pressure. That is not the same location as an exposure monitor, and one instrument rarely serves both jobs well.
3. Process or trend monitoring
If the reading feeds a control loop or a long-term trend, representativeness beats proximity. The sample point should sit in the bulk airflow of the space, away from walls, corners, and the outlet of the ventilation system, so the value tracks the room rather than the wall it is screwed to.
Ozone Is Denser Than Air, But That Is Only Half the Story
Ozone has a molecular weight of about 48 against roughly 29 for air, so undiluted ozone is close to 1.6 times as dense. In a still room a release tends to sink and layer near the floor, which is why leak detection points are often placed low. Industrial rooms are rarely still, though. Ventilation, thermal plumes from equipment, and the air movement from a generator's own cooling fan mix a release upward within seconds.
Treating density as the dominant force produces sensors on the floor that see nothing; treating it as irrelevant produces sensors at ceiling height that miss the pool at ankle level. The practical answer is to place detectors where the air actually moves, then confirm the choice with a tracer test instead of reasoning about molecular weight alone. The same principle applies to indoor air quality work generally — the U.S. Environmental Protection Agency's guidance on ozone generators sold as air cleaners makes the point that ozone concentration in a room is a function of the source, the volume, and the air exchange, not of the source alone.
Rules That Apply to Every Installation
- Height: breathing zone (approximately 1.2–1.5 m) for exposure monitoring; lower and closer to sources for leak detection.
- Distance from the source: far enough that the reading is not dominated by the outlet plume, close enough that a leak is seen before it disperses. Two to four metres from a generator enclosure is a workable starting point for an exposure point; the tracer test decides.
- Out of moving air: not in front of supply diffusers, not beside doors, loading bays, or open windows. A monitor sitting in a draught reads the draught.
- Away from sun and heat: a UV bench is temperature-sensitive in both optics and electronics; a dark enclosure in afternoon sun adds several degrees and shifts the baseline.
- Humidity and condensation: saturated sample air, or air cycling between wet and dry, fogs an optical cell and stresses an electrochemical one. Drain legs, filters, and a conditioned sample line are part of the installation, not an accessory.
- Chemical interference: electrochemical cells respond to more than ozone, and silicone vapours, solvents, and aggressive cleaning agents can bias or poison them. Keep the monitor out of degreasing areas and away from sealant that is still curing.
- Access for service: a monitor that needs a ladder, a harness, and two people to reach will not be calibrated on schedule.
- Electrical noise: avoid mounting directly against VFD cabinets, large contactors, or welding equipment. Induced noise on signal lines shows up as random spikes that look like real events.
Sampling Lines Change the Answer
Remote sampling is often the only way to get a monitor into a clean, accessible location. It also introduces delay and loss. Use PTFE or another inert tubing, keep the run as short as the layout allows, and size the pump and flow so the sample reaches the cell within a time that is still useful for the alarm logic.
Ozone is reactive and decays on surfaces, so a long narrow line under-reports a short excursion: the reading arrives late and low. If an alarm has to act within a minute, the sensor has to be near the air it is judging. This is one of the quieter causes behind a reading that looks wrong after commissioning — our note on why an ozone detector reads low covers the sampling side in more detail.
Commission With a Tracer Test
After mounting, walk the space. Release a small amount of tracer — a smoke pencil at the likely leak points, or the plant's own generator at a low, controlled output — and watch where it travels and how quickly the monitor responds. Record the interval from release to alarm. That measured number, not the datasheet response time, is what the site's emergency procedure should be built on.
| Check | Target | Why it matters |
|---|---|---|
| Mounting height | 1.2–1.5 m for exposure; lower for leak detection | Matches the air the limit applies to |
| Distance to source | 2–4 m, confirmed by tracer test | Avoids plume domination and dead zones |
| Air movement | Bulk room airflow, not a diffuser jet | A representative rather than local value |
| Sample line | Inert tubing, as short as practical | Limits decay and transport delay |
| Response time | Measured and logged on site | Sets a realistic alarm response window |
| Alarm setpoint | Above local background, below the action level | Prevents nuisance trips and late warnings |
| Service access | Reachable without scaffolding | Keeps calibration on schedule |
Placement and the Maintenance Schedule Are Linked
Where the monitor sits determines how often it needs attention. A unit drawing dusty air needs its filter changed more often than one in a clean corridor; a remote sampling line needs its flow checked on every visit. The interval logic is set out in our guide on how often to calibrate an ozone detector, and the difference between a functional response check and a true calibration is covered in bump test versus calibration.
One consequence of poor placement is worth flagging: an instrument mounted in a pocket of still air will pass every calibration and still miss the event it was bought for. If a reading disagrees with what people in the room report — irritation, a metallic smell — suspect the location before suspecting the sensor.
Dissolved Ozone Is a Separate Problem
In water lines, placement means something different. The sensor has to see a representative flow at a stable pressure and flow rate, with no trapped air, and far enough downstream of the injection point for mixing to be complete. A probe pushed into a dead leg near the injection port will read high and unsteady; a probe in a bypass loop with a controlled flow will read the water that is actually being treated. Our dissolved ozone monitors are built for inline and bypass installation at a defined flow rate, which is the arrangement that makes a reading repeatable.
Choose the Position Before the Instrument
Placement is engineering, not convenience. Decide what the number has to prove, mount the instrument where that air is, verify the choice with a tracer test, and log the response time you measured. Everything downstream — alarm logic, calibration interval, the compliance record — depends on that first decision.
If you are selecting an instrument rather than relocating one, our gas phase ozone monitors cover ambient, workplace, and process ranges. Send the room layout, the source locations, and the concentration range you expect through our quotation page and we will suggest a mounting position and a sampling arrangement to match.
 Where to Install an Ozone Moni
Ozone Monitor Bump Test vs Cal
 Why Is My Ozone Detector Readi
PPB-Level Ozone Measurement: C